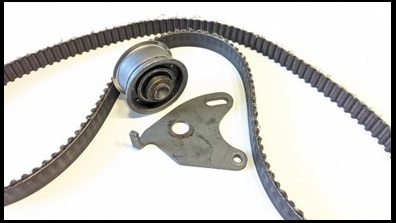
Timing belt tensioners are essential in maintaining correct belt tension, ensuring smooth engine operation and longevity. A common misconception is that spring-loaded tensioners self-regulate tension during engine operation. However, their role is limited to the installation phase. Incorrect installation can lead to premature system failure, costly repairs, and severe engine damage. In this guide, we examine best practices and pitfalls when installing spring-loaded tensioners, using the Mitsubishi 2.5 D engine with KIT K025435XS as an example.
The installation of this type of timing belt tensioner without spring included in the tensioner seems to be simple to install, but following the installation process is crucial to avoid premature failure of the system with catastrophic engine damage consequently. Gates has detected that there are certain installation mistakes that can be made, let's see what they are and how to avoid them.
Key Installation Considerations for Spring-Loaded Tensioners
1. Understanding the Role of the Spring
The integrated spring in these tensioners is designed to facilitate correct
tensioning only during installation. It does not actively regulate belt tension while the engine is running. If bolts are not properly tightened or lose torque, the system will fail due to insufficient tension.
2. Ensuring Proper Belt Alignment
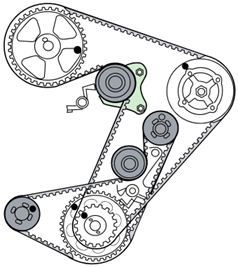
Many engines, like the Mitsubishi 2.5 D, feature two timing belts—one for balancer shafts and another for valve timing. Both require precise alignment:
- Position the camshaft belt and engage the tensioner spring.
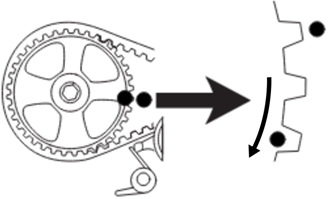
- Before tightening the tensioner bolts, rotate the crankshaft two teeth forward relative to the setting mark.
- This step ensures tension is evenly distributed across the belt, preventing slippage and tension loss when the engine starts.
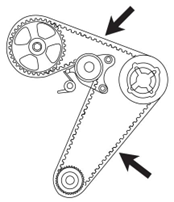
3. Correct Bolt Tightening Sequence
Improper tightening can cause excessive belt tension, leading to premature system failure. Follow these steps:
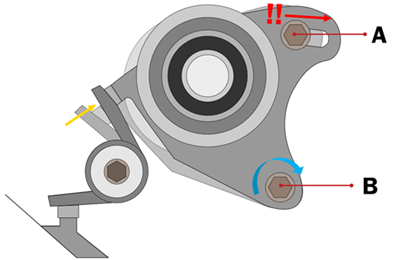
- Tighten screw A first, then screw B.
Screw B serves as the pivot point, allowing the adjustment plate to rotate and apply correct tension.
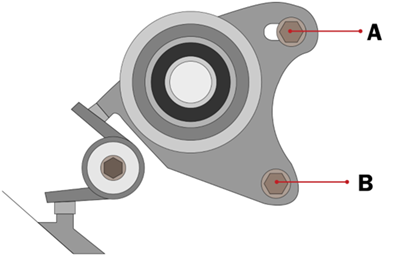
- Tightening in reverse order may cause unintended plate rotation, affecting belt tension.
4. Checking the springs
Although many OE instructions do not mandate spring replacement during each installation, it is recommended. The spring remains in a fixed position throughout the previous belt’s service life, potentially affecting its ability to provide correct installation tension.
Following the instruction manual, the first steps are:
- Screw to tighten. Finally, to be 100% sure that the tension has been applied correctly, it is necessary to check that the system tension is correct, preferably by using a Gates STT-1 sonic tensiometer where indicated in the installation instructions.
For 100% accuracy, verify belt tension using a Gates STT-1 sonic tensiometer, following manufacturer specifications. This tool ensures correct tension levels and prevents premature failures due to improper setup.
For detailed guidance on using the STT-1 tensiometer, check:
-
As we mentioned at the beginning, this particular engine is just one example of all the systems that have this type of tensioner, but in all tensioners of this type we must always pay special attention to the points mentioned in this article.
Conclusion: Avoid Costly Mistakes with Proper Installation
Spring-loaded tensioners simplify installation but require strict adherence to best practices. Ensuring proper alignment, following the correct tightening sequence, and verifying tension with a tensiometer are critical to engine longevity. By avoiding common mistakes, you can ensure the reliability and performance of your vehicle’s timing system.